A green lawn changes everything, it makes a yard look fresh and clean. Patchy or brown grass can make a property look old and neglected but installing sod can fix that really fast. For homeowners in the USA, knowing how to prep, lay, and care for sod is important, even if it seems simple.
A.P. Excavation & Landscaping provides professional sod installation, and there are lots of little things that make a big difference when doing it right.
What is sod and why use it?
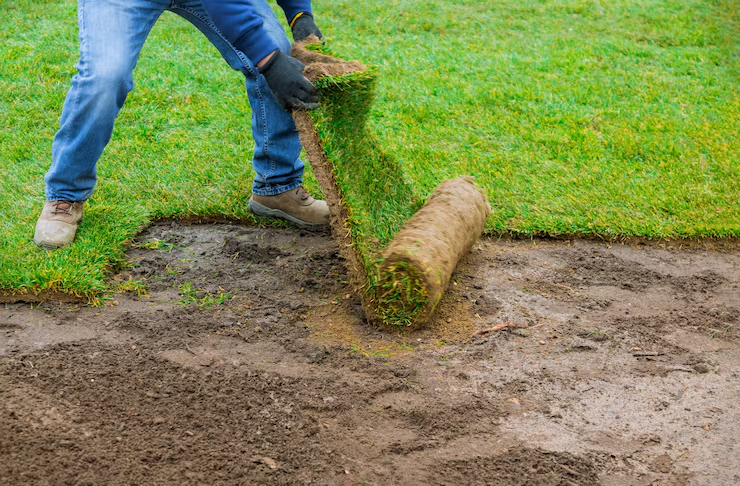
Sod is grass that is already grown and comes in rolls or strips. Unlike seeds, installing sod gives instant green coverage. Some benefits:
- Instant green lawn
- Less chance of weeds
- Reduces soil erosion
- Lawn ready to use faster
It’s a great way to get a full looking lawn fast instead of waiting for seeds to grow.
How do you prepare for sod installation?
Proper prep is the most important part. How to prepare for sod installation starts with cleaning and getting soil ready.
Steps:
- Remove old grass and debris – Can you install sod over existing grass? Sometimes yes but it’s not ideal. Old grass can block roots and stop sod from taking. Best results come from bare soil.
- Level the ground – Uneven soil can make lumps and drainage problems later. Rake or till.
- Add compost or fertilizer – Helps roots grow. Soil tests can be helpful sometimes.
- Water lightly – Soil should be damp but not muddy.
Skipping prep usually causes problems, even if sod looks healthy when you lay it.
Tools needed for sod installation
A few tools make it easier:
- Shovel and rake
- Lawn roller
- Wheelbarrow
- Garden hose or sprinkler
- Utility knife for cutting sod
Lawn roller is useful, helps sod roots make contact with soil. Skipping it can leave air pockets or uneven spots.
Step by step: How to install sod grass
Step 1: Lay the first row
Start along a straight edge like a driveway or sidewalk. Keep edges tight, don’t overlap, and stagger seams brick style.
Step 2: Next rows
Push pieces snugly against the previous row. Don’t stretch or overlap, edges can die.
Step 3: Cut to fit
Utility knife for curves, trees, and flower beds. Don’t fold or force pieces, roots tear easily.
Step 4: Roll sod
Use a lawn roller after each section. Press roots into soil, remove air pockets, and help sod settle better.
Step 5: Water immediately
Water right after laying. Keep damp for at least 2 weeks, sometimes daily, until roots grow into soil.
Even little mistakes like leaving gaps, skipping rolling, or forgetting to water can make patchy grass.
Can you install sod over existing grass?
Technically yes but it is risky. Old grass blocks roots, can cause uneven surfaces, and weeds may grow through. For best results remove old grass.
How much sod do you need?
Measure yard: length x width = sq ft. Sod rolls are usually about 10 sq ft each. Order a little extra 5–10% for edges, curves, and mistakes.
Sod installation tips
- Work quickly, sod dries fast in the sun
- Stagger seams to prevent long seams
- Water daily first 2 weeks
- Fertilize after roots start to grow
- Keep pets and kids off new sod for at least 2 weeks
Following tips helps roots establish faster and the lawn look uniform.
How to water new sod
Watering right is critical. Too little = roots die, too much = rot.
- First 2 weeks – keep soil and sod damp 1–2 times per day
- Weeks 2–4 – reduce to deeper watering 2–3 times per week
- Established lawn – water 1–2 times per week depending on rain
Curling edges = too dry, soggy spots = too wet.
When can you mow new sod?
Wait until the grass is about 3 inches tall. Cutting too early will pulls the roots.
- Mow al a high level the first few times
- Use sharp blades
- Don’t cut more than 1/3 of blade height
Maintaining sod after installation
- Fertilize monthly
- Remove weeds quickly
- Water deep when dry
- Aerate once per year
Irregular water or mowing too short can hurt first-year growth.
Can sod be installed in cooler weather?
Yes, fall is ideal in many areas. Cooler temps = less stress, roots grow better. Avoid frozen or very hot ground.

How long until sod is fully established?
Roots start to grow in 2–3 weeks. IN 4–6 weeks roots will be anchored. For full thickness density allow a few months depending on climate and grass type.
Common mistakes
- Not prepping soil properly
- Leaving gaps between rolls
- Overlapping sod
- Not watering enough
- Walking on sod too soon
Even small mistakes will result in patchy lawn.
Handling curves or odd-shaped areas
- Cut sod small with utility knife
- Fit snug, and remember not to overlap
- Fill gaps with soil if needed
- Water after cutting
Tricky areas need attention for uniform lawn.
Can sod be installed on slopes?
Yes, but carefully:
- Lay horizontally across slope
- Pins/staples to hold sod
- Water carefully to avoid runoff
Prevents sliding, helps roots establish.
Final Thoughts
A green, lush lawn is possible fast with proper sod installation. Preparing soil, laying sod carefully, watering properly, and maintaining the lawn are the keys to success. Small mistakes can affect growth, so following these tips is important.
For professional results, contact A.P. Excavation & Landscaping today for expert sod installation and make your yard healthy, green, and beautiful.